Healthy Meals TO Burn Fats

Monday, April 06, 2020

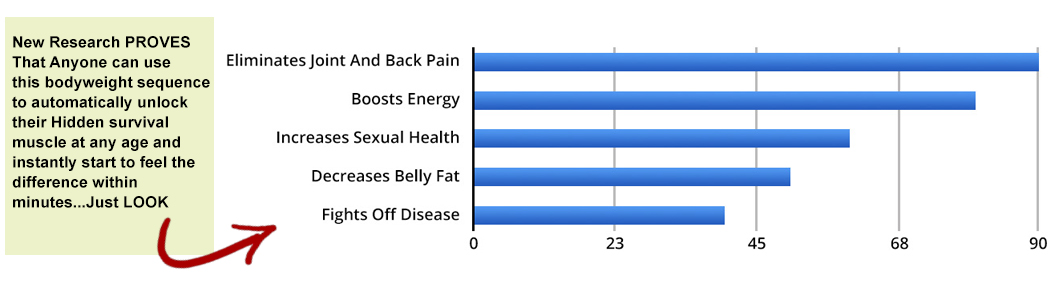
The "Hidden Survival Muscle" In Your Body

Monday April 06, 2020
Training Hard Dear Friend,

DON'T WANT TO READ ALL ARTICLE CLICK HERE

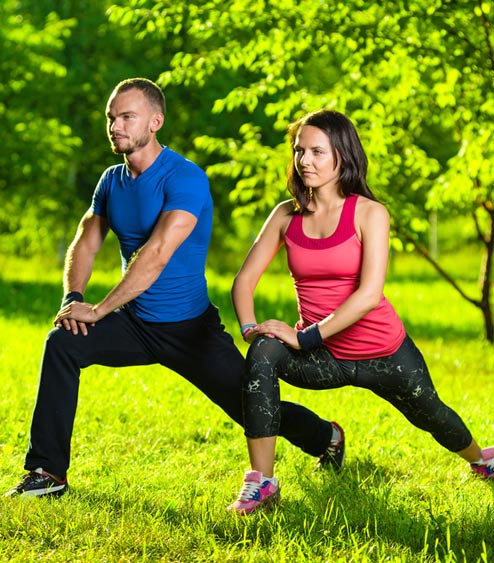
You train hard, you eat well…it should be enough to keep you in good health and physically and emotionally strong.
Yet, there is a danger lurking in our bodies that's not only hidden from us… but which even doctors are failing to identify.
It affects nearly everybody, no matter how active or sedentary you are, or how old or young you are.
This problem affects not only our body but our whole well-being.

And when I tell you what it is, you'll be shocked…

Hip Flexor Muscles … because it's tight hip flexors.
You see, our hip flexors are the engine through which our body moves. They control balance, our ability to sit, stand, twist, reach, bend, walk and step.
Everything goes through the hips.
And when our hip flexors tighten it causes a lot of problems in ordinarily healthy and active people, like us.
Before I reveal how most people end up having tight hip flexors yet never realize it, let me introduce myself.
Coach Mike Westerdal My name is Mike Westerdal and I'm a national best-selling fitness author, sports nutrition specialist, personal trainer, Iron Man magazine contributor and founder of the internet's longest-standing strength site, CriticalBench.com.
In a moment, I'll reveal to you the 10 Key Moves you need to loosen your hip flexors and unlock the hidden power in your body.
But first, let me explain just how deep-rooted the problem is.

The shocking ways
that tight hips
are holding you back…
that you won’t believe

Here's the truth: Most people don’t realize the cause of their problems is tight hip flexors.
The impact the hips had on the whole body never occurred to me until I saw the effect of tight hip flexors had on the health and well-being of my wife after she gave birth.
It was only then that I truly understood the magnitude of the problem.
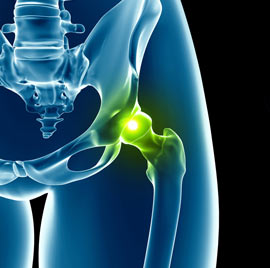
We're not just talking about a bit of soreness; tight hip flexors are the root cause of problems such as:
  • Nagging joint pains in your legs, lower back or hips
  • Walking with discomfort
  • Hips locking up
  • Bad posture
  • Trouble sleeping
  • Sluggishness in day to day life
  • High Anxiety
  • Digestive problems
  • Compromised Immune System
  • Circulatory issues
  • Loss of sexual performance
  • Lack of Explosiveness in the gym or sports
If any of these sound familiar to you, don't worry because you're not alone.
Tight hip flexors affect nearly everybody, but few realize the impact on your whole body.
Again, everything flows through the hips.
Think of the hips as a barometer. The health and flexibility of your hip muscles are an indicator of the strength and health of our whole body.
And at the very heart of this is the "hidden" most powerful survival Muscle. When this muscle is healthy, we are healthy.

Introducing The Body's Most Powerful, Primal Muscle… … That You've Never Heard Of

Let Alone Trained!
The Psoas muscle
Your hips are the bridge between your upper body and lower body. They are at the center of your body's movement.
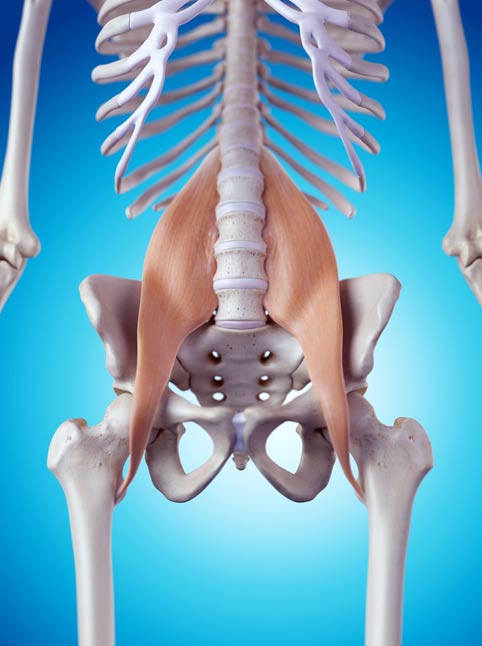
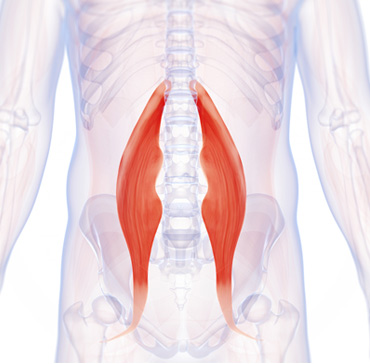
Sitting within the well of your hip and lower spine is the psoas major muscle, one of the two muscles that makes up the iliopsoas.
It’s often called the "mighty" psoas (pronounced so-az) for the many important functions it plays in the movement of your body.
The psoas is the only muscle in the human body connecting the upper body to the lower body.
The muscle attaches to the vertebrae of the lower spine, moves through the pelvis and connects to a tendon at the top of the femur. It also attaches to the diaphragm, so it’s connected to your breathing, and upon it sits all the major organs.
A functioning psoas muscle creates a neutral pelvic alignment, stabilizes the hips, supports the lower spine and abdomen, supports the organs in the pelvic and abdominal cavity and gives you greater mobility and core strength.
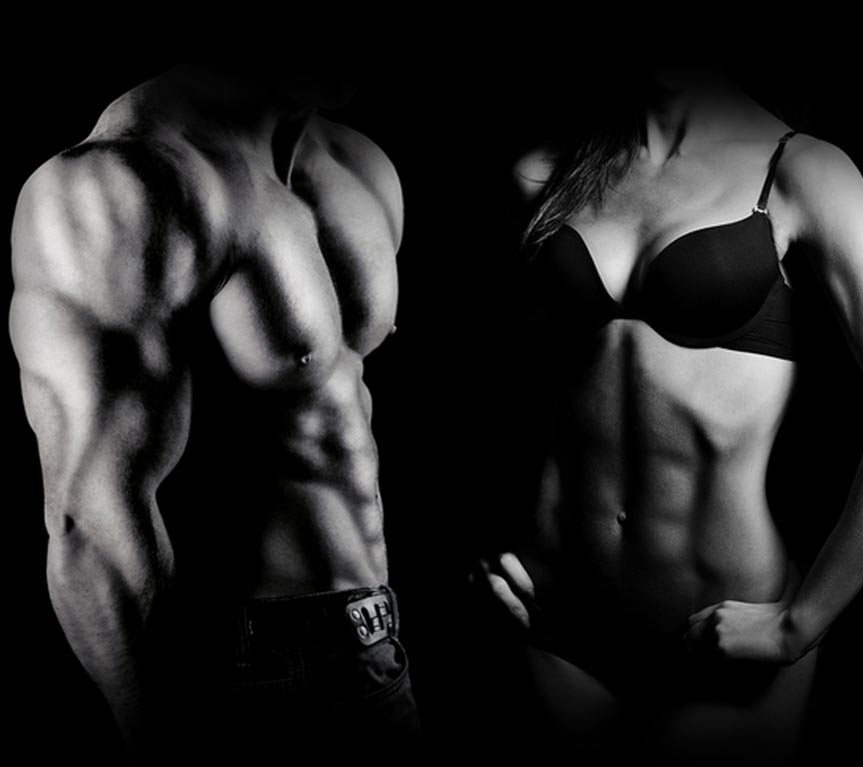
When it functions well, it has the power to…
  • … help you achieve peak performance day after day after day.
  • … rapidly drop ugly body fat that stubbornly clings to your body.
  • … train harder, heavier and gain strength faster than you thought possible.
  • … hit your peak of sexual health.
  • … flood your mind and body with renewed energy and vigor.
Put simply, this muscle is the core of activity in your body. So, when it's out of balance or if the psoas tightens, there are serious consequences which flow throughout the body.
And there's one activity, in particular, that's the sworn enemy of your psoas muscle…

CLICK HERE TO SHOP THE PRODUCT

The No.1 activity that's making you weaker,
fatter and is KILLING your sex life

Sitting is harmful
It may be the most harmless activity known to man, but it's also one of the biggest dangers to your health.
Sitting! 
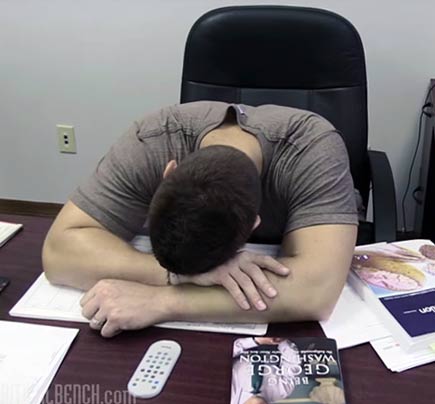
Even if you're the most active of athletes, you may still suffer from a tight psoas due to the amount of time you spend each day planted to a chair.
Weakness, shortening and tightness develops in the muscle through sitting for extended periods of time, poor sleep posture and even stress and tension.
Here are 3 ways that sitting is killing your physical and emotional health:
Bulging Belly
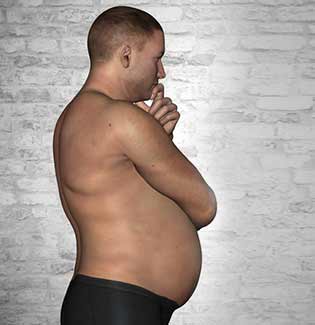
Bulging belly syndrome
Wonder why your stomach still sticks out even though you’re hammering the core exercises every day? It's a common myth that bulging belly is due to weak abdominal muscles. The real cause is likely to be tight psoas muscles, which cause the lower back to curve pushing out the stomach. When the psoas works properly it pulls the abdomen back tucking the tummy in, giving you a strong, flat stomach.
Stress Response System
Fat loss inhibitor
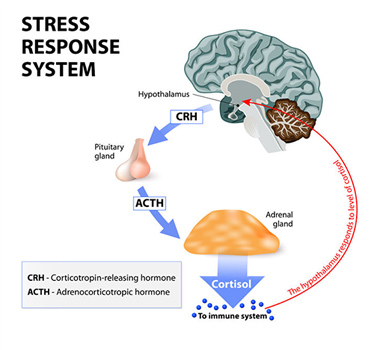
As the body's "fight or flight" muscle, your psoas is deeply connected to our natural survival instinct. It instantly tightens in moments of danger to either protect you (in a fetal position) or help you run, fueled by the release of adrenaline. However, if your psoas is constantly tight, it signals to the body you are in constant danger, leading to overworking of the adrenal glands. When this happens, your immune system suffers and your body automatically switches into fat storing mode in anticipation of danger. Can’t shift that weight? Blame your hips also known as your "survival muscle".
Lack of Sexual Performance
Lack of sexual performance
Sitting all day causes your hips to become stuck in a forward thrust position. This leads to pulling on the lower back and decreased blood flow and circulation through the hips and to where it matters.
Sitting is your enemy in the quest to discover peak health,
because of the wide-ranging impact it causes to your most vital muscle.

What your physician ISN'T telling you…
and what they  don’t know

Diagnosing tight hip flexors is tricky.
If you've seen a therapist or physician, chances are they weren't able to pinpoint the issue.
Buried so deep within your abdomen, it's no wonder identifying it as the root cause of any of your symptoms is difficult to do.
It's why tight hip flexors are left undiagnosed and untreated for far too long, as physicians look for a simpler explanation.
So understand that this it's not your fault.
However, knowing this hands you the power to finally do something about it before it's too late.

Why "Static" Stretching Alone Isn't the Answer

Static Stretching
Knowing you have tight hip flexors is one thing.
Knowing how to fix your hip flexors is another challenge altogether.
If you trust so-called experts on Youtube and online, they'll have you believe it's simply a case of holding a few static stretches for a period of time to try and lengthen the muscle.
Or rolling around with a tennis ball stuck to your hip (as if that will really make any difference).
It takes more than a tennis ball and foam roller to unlock your hip flexors…and doing it wrong could cause even MORE damage.
The reason few people manage to fix their hip flexors is simple.
It's really a hard area to reach.
If you see how the psoas is attached within your body, it's buried deep inside your core making it tough to access. It's a hard muscle to find, let alone train.
Hip Flexor Exercices
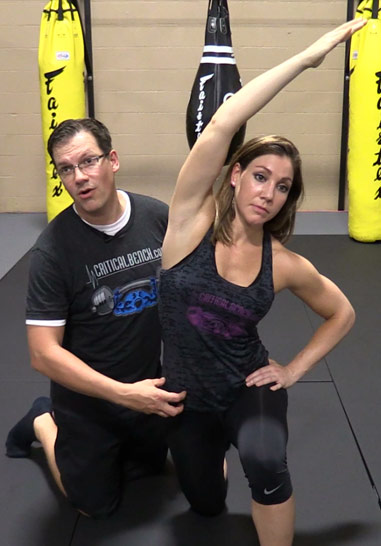
Static Stretching Has Its Place - But The Stretch You See Above Is the Best Stretch To Do In The Morning
So it's little wonder why trying to loosen it requires more than a simple static hip flexor stretch like the one below you've probably tried before.
You've probably found you're spending (or wasting) hours of your time stretching this way only to find it's having minimal effect.
That's because you need to attack the muscle from a variety of angles using a variety of exercise techniques and modalities in order to "unpack" the muscle in the right way.
The truth is, you can learn to release your tight hip flexors on your own.
If you think of your psoas as a combination safe lock, there are several numbers that will unlock it but they need to be entered in the right order.
There are a number of specific movements beyond simple static stretching you can use to unlock and loosen your hips, legs and back.
Some of these include
PNF Stretching
PNF Stretching:
PNF is an acronym for proprioceptive neuromuscular facilitation. It is a technique where you are activating a specific muscle in order to relax the muscles around a joint so you can decrease the stiffness around a joint.
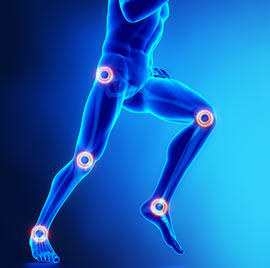
Dynamic Stretching
Dynamic Stretching:
This is where you are activating the muscle around a joint and moving that joint through its full range of motion in a progressive manner. This leads to an increased range of motion around the joint, warming up of the muscle around the joint and improved circulation around the joint. Think of high knees or butt kicks.
3-Dimensional Core Stability Exercises
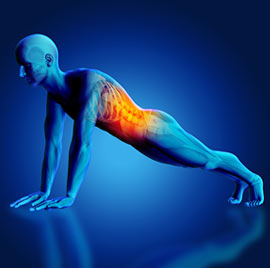
3-Dimensional Core Stability Exercises:
With these exercises we are targeting the muscle in all planes of movement so the core and abdominal muscles have good activation, endurance and strength in all planes of movement which leads to a decrease in unnecessary damaging stress on joints.
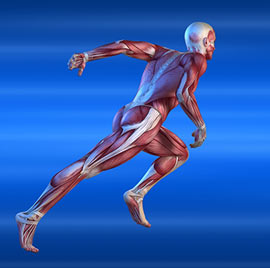
•	Mobility Exercises
Mobility Exercises:
In these exercises, we are targeting the joint and doing movements and exercises that help the joint function optimally. This allows a joint to move more freely.
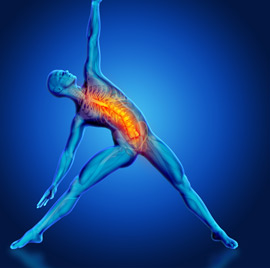
Fascia Stretching
Fascia Stretching:
In this unique technique, we are targeting the tissue that muscles are surrounded in and working on loosening and lengthening the fascia. Few people understand the negative effect this tissue can have on your body.
Muscle Activation Movements
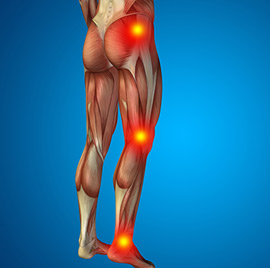
Muscle Activation Movements:
Due to all of our sitting and daily technology use, many of our muscles are not working properly. With this technique, we're targeting those muscles that are off and activate them in order to help the body move more efficiently.
Now you know the specific techniques you need to unlock your hip flexors, the next question is how to combine these in the most effective way. Please don't be overwhelmed by the "Shop Talk" above because…

Loosening Your Hip Flexors Can Actually Be Easy
With the SEQUENTIAL FLOW Method

Like unfolding a sheet or unpacking a parcel, opening up the muscles in your hips requires it to be done in the right order.
Try to release one muscle before another and you'll add to your tightness. Getting it wrong really can make it worse.
It's why so many people give up trying to fix the problem themselves and believe incorrectly that they have to live with the problem. But hoping the problem will go away by not exercising is just as damaging.
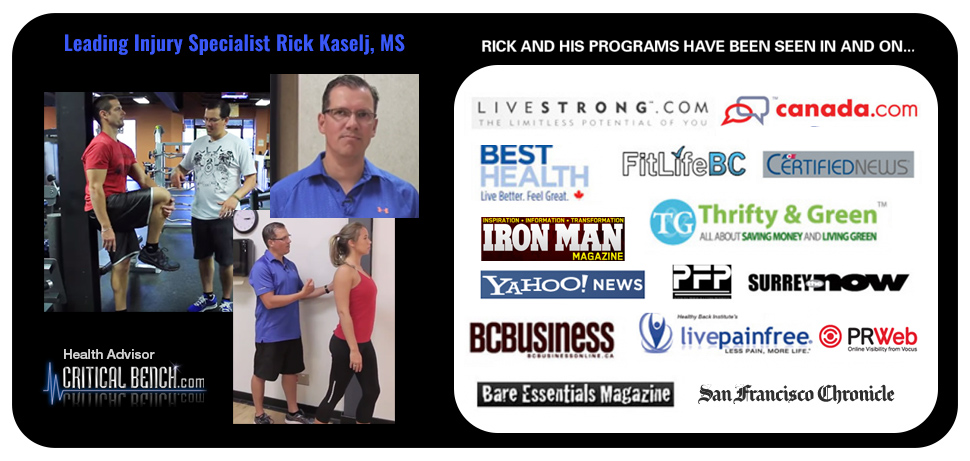
To explain in more detail about this flow, let me introduce you to leading Kinesiologist and Injury Specialist Rick Kaselj, MS.
Rick is "THE" guy fitness professionals go to when they want to learn about the latest techniques to help their own clients. He's given over 352 live presentations to more than 8,152 health professionals in the US and Canada.
Rick Kaselj I first met Rick when he helped me fix a shoulder problem. He was one of the few injury specialists I met who helped athletes by focusing on getting them back to training, rather than avoiding workouts.
Rick showed me what so many other injury specialists hadn't - how to work through the right sequence of techniques to unlock the tension and tightness in my muscles to properly solve the problem.
Courtney and Lincoln
He's the guy I turned to when my wife, Courtney, was struggling with pain and discomfort in her hips after the birth of our son Lincoln.
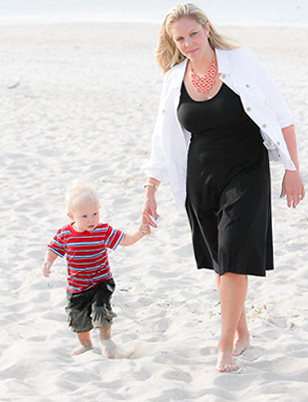
In the days and months following the birth, she experienced pain in her legs and discomfort when walking and sitting. She was struggling to sleep.
In just 15 minutes working with Rick, he'd successfully unlocked her hip flexors so she no longer felt any pain or discomfort that day. She was able to walk without experiencing the nagging pain in her pelvic area. She could sleep better and could start enjoying those precious days with a little one at home.
But Rick's "flow" technique doesn’t only help those in pain.
At Critical Bench, our Head Strength Coach Chris Wilson felt his hip flexors were a little tight (from sitting and answering training questions on facebook too much) and tried the same routine Rick had used with my wife. Within days, Chris successfully increased his deadlift by 35 pounds to finally hit that 500 pound pull he had been training for. All because he got to experience the sequential flow of movements that Rick developed to release his hip flexors.
It’s not about the exercises.
The power of Rick's technique lies not only in what techniques are performed and how well, but in doing these in the proper sequence.
Done effectively, the sequential flow works with your body to
activate its natural healing process, improve flexibility
while adding strength and vitality.
While many of the techniques were ones I already knew, doing the movements in the right order unravels all the tissues including muscle, fascia, connective tissue, and the joint capsule while breaking up scar tissue.
Using the right sequence kick starts an increase in blood flow to the area to clean out metabolites and lactic acid and reduces inflammation while nourishing and rejuvenating the area.
I've seen, with my own eyes, the power of Rick's techniques on my wife and our Head Strength Coach Chris Wilson.
That's why I asked Rick to share with you the very same program so you too can help to unlock your hip flexors and gain all the benefits.

WANT TO TRY THIS PRODUCT

Saturday, March 21, 2020

How to Protect Yourself From Corona Virus{ 5 simple ways }

                          5 Simple Ways To protect Yourself From Corona Virus

   Step 1 : Don't touch your nose,eyes and mouth;
                          Our hands touch so many things they can pick up virus easily. So,avoid infecting           yourself by keeping them from your face,
                              
Step 1


Step 2 : Wash Your Hands Regularly;
                        Use plenty of soap and scrub for at least 20 seconds,
                                        
step 2

Step 3 : Don't  sneeze into your hands;
                Use a tissue and throw away  in dustbin immediately,

                        
step 3


Step 4 : Keep your  distance from anyone coughing or sneezing;
              At least 1 meter away,To avoid inhaling droplets sprayed from coughs and sneezes,

                                         
step 4

Step 5 : If you feel unwell,seek medical attention;
              Stay  at home if  you have a cough, fever or difficulty in breathing,
              Call a health professional and follow there advice,

                       
step 5

    #staysafe 
#share with your friends and let them know

Source : World Health Organization  

Thursday, January 30, 2020

How to Make the Best Milkshake Ever

                              How to Make the Best Milkshake Ever

How to Make the Best Milkshake Ever;

Ingredients

  •    1/3 cup milk.
  •         You can use 2%, whole milk, or a blend of milk and     half-and-half.
  •     1-1/2 cups ice cream
  •         Vanilla makes a good base for most shakes, or you can use a flavor like chocolate.
  •     Delicious mix-ins!
  •         Think a swirl of chocolate syrup, peanut butter, a chopped banana or other fruit, a handful of chocolate or butterscotch chips (we could go on and on…)
  •     A blender, of course.
  •         You can use a classic stand blender-or an immersion blender if you want to make it right in your glass.

Instructions;


  Step 1: Add the Milk, Ice Cream and Mix-Ins
  Learn how to make a milkshakeTaste of Home

 Send your ingredients straight to the blender. For best results,   put in your milk first. That will get the blender mixing quickly. Be sure to let your ice cream soften before scooping. If it’s too hard, you might end up having to add more milk, which thins the shake.

Test Kitchen tip: For an ultra-rich shake, use whole milk or milk with a little half-and-half cream. But never use heavy cream. If you send that through the blender, it’ll create little bits of butter.

We’re going to make a strawberry shake, so we’ll add 1/2 cup frozen unsweetened strawberries and 1 tablespoon strawberry preserves.

Editor’s tip: Remember that any ingredients you add will soon be pulverized in the blender. If you want to keep the size and shape of mix-ins like sprinkles, cherries or chocolate chips, it’s best to reserve as a garnish. 

Step 2: Blend ’til smooth

Ice cream, milk and strawberries in a blender

It’s time to blend away. You’ll want to keep an eye on the consistency. This recipe creates a Goldilocks-style shake: not too firm and not too soft (runny). Of course, you can always customize it either way. Use less milk for a thicker, spoonable shake; more for a thinner, sippable one.

Be sure to check our our Test Kitchen’s recommendation for the best blender for your milkshake. 

Step 3: Pour and Enjoy!

Strawberry milkshake in a glass with a green striped straw sticking out

Pour your milkshake into a chilled glass to serve. It tastes great straight-up or topped with a tower of whipped cream. Feeling fancy? Layer on toppings like chocolate syrup, sugary cereal or rainbow sprinkles. Once you’ve mastered the classic garnishes, try these crazy takes!
.
 #Makemoodwithfood
#Comment Down Below If You Like My Blog

Wednesday, January 15, 2020

10 Basic Cooking Tricks You Should Know


     10 Basic Cooking Tricks You Should Know 

 A few simple cooking tricks can make a boring dish even more delicious or simplify your cooking process altogether. 

So here are 10 basic cooking tricks you should apply ;

1. Don’t overcrowd the pan;

You might think you have enough room in your skillet for an extra piece of chicken, but if it’s questionable, don’t risk it. There’s a chance the heat won’t distribute properly to the rest of the food in the pan, thus affecting flavor or, worse, creating a health risk. As a preventative measure, leave a few inches between each item to ensure they cook thoroughly.


2. Let red meat sit before cutting into it;


Even a well-done steak should never taste dry. To prevent a steak from losing its juicy interior, place it directly on top of aluminum foil after taking it off the stove or grill. Carefully wrap the steak in the foil and let it sit for approximately five minutes. This allows the juices to settle before you cut into the meat. The meat will continue to cook while it is in the foil so if you prefer medium steak, you should take it off when it’s medium rare.

3. Store spices in the right location;


To prolong the life of your spices, keep them in a cool, dark place. Don’t store them on top of the stove, as heat and humidity can alter their flavor.


4. Shut the stove off before eggs are done;


The trick to great eggs is to not overcook them! Whether you scramble, fry, or poach, always turn off the stove a few minutes before the eggs look done—even when they seem a bit runny. The remainder of the heat will cook them to fluffy perfection.


5. Chop herbs with salt;


To prevent herbs from flying all over the place when chopping, sprinkle a bit of salt onto the board. This will keep them in place.

6. Add salt to boiling pasta water;


When you make pasta, salting boiling water will add flavor from the inside out. The rule is about 1-2 tablespoons for a large pot of water, stir it until it dissolves, and once boiling, add pasta. It sounds simple , but it will elevate the taste of your dish.


7. Use pasta water to create a pasta sauce;


If you thought your pasta tasted good before, wait until you try this trick. Before dumping used pasta water, add a cup of it to your sauce pan. Then, add the pasta directly into the skillet. The salty water will add more flavor to your dish. Reserved pasta water also contains starch that can be used to adjust the consistency of sauce. Your taste buds will appreciate it—and the texture will be spot on. Trust me


8. Always keep a few essentials on hand;

We’ve all been there. You stare in the fridge, thinking there’s nothing to eat, so you order take-out and call it a night. Nope. Stop right there. Consult our list of pantry essentials and stock up on your next grocery store trip. It’s easier to get creative with what you have if you are stocked with the right tools. Bonus points if you keep meat (chicken breast, hamburger meat, salmon, etc.) and frozen vegetables in your freezer for last minute meals.


9. Use a paper towel to preserve vegetables;

It never feels good to throw away food you haven’t touched, especially produce. Prolong the life of vegetables by wrapping them loosely in a dry paper towel and placing them in a re-sealable plastic bag. Oxygen is not a friend of veggies, so get as much air out of containers and bags before sealing. Also, avoid washing until you are ready to eat produce. And make sure to leave ample room in your refrigerator and produce drawer. Overstocking can cause less air to flow through the refrigerator, which can cause uneven temps with food expiring faster.


10. Keep the root of the onion intact to help with slicing;
Onions can be difficult to slice into without making a mess. To cut them evenly, do not remove the root. While keeping it intact, peel the onion and slice in a horizontal direction. Then, cut down vertically to create perfectly minced pieces.

#makemoodwithfood


Do you know any basic cooking tips? Tell us in the comments below!

Monday, January 13, 2020

How To Make Pancakes Step By Step At Home

                                  How To Make Pan Cakes At Home

 Weekend mornings are made for pancakes, but getting them to turn out just right can be stressful―especially when you’re cooking for a crowd.

Leisurely, weekend mornings are made for fabulous brunches with homemade pancakes, crisp bacon, and fresh-squeezed fruit juices. But if you don’t know how to make pancakes, the process may be a bit more stressful than delightful—especially if you’re cooking for a crowd of hungry pancakes fans. Here, our editor show you how to make pancakes step-by-step. You can use this guide on how to cook pancakes with pre-made mixes like our Pancake Mix, or any favorite pancakes recipes. These Pumpkin Pancakes with Spiced Maple Syrup are always a hit, as are classic Buttermilk Pancakes.


What You Need Or Material Needed;

  •     whisk, two mixing bowls
  •   pan or griddle,  
  •    vegetable oil,
  •    ladle or measuring cup,
  •    large spoon,
  •    spatula

Follow These Step By Step;


  1.     Mix flour, baking powder, salt, and sugar
  2.     In a medium-size mixing bowl or large glass measuring cup, whisk together your dry ingredients (or follow directions for premade pancake mix).
                 
                     
How To Make Pan Cakes At Home
Mix flour, baking powder, salt, and sugar

  1.     Mix milk, eggs, and oil
  2.     In a separate bowl, whisk together the wet ingredients (milk, eggs, vegetable oil, or melted butter) until the egg is broken up (this will prevent overmixing in the next step).
  3.     Mix dry ingredients with wet ingredients
  4.     Add the wet ingredients to the bowl with the dry ingredients. Stir them together until you stop seeing flour. Remember to not overmix, which makes the batter tough.

                       
How To Make PanCakes At Home
batter

 Some Important Tips You Gotta Know;


    Tip 1: Keep a few lumps in your batter to keep the pancakes tender. 
             Pre-heat the pan or skillet
           Turn your stove to medium-high heat and place a large skillet or griddle on the burner.

                                
How To Make PanCakes At Home


    Tip 2: To test for temperature, sprinkle a few drops of water on the pan. It’s hot enough when the      droplets bubble up and evaporate. 
    Add oil to pan
    Moisten a paper towel with vegetable oil and use it to lightly wipe the bottom of the pan. This will keep the pancakes from sticking.
    Pour the batter into the pan
    For each pancake, gently pour 1/3 to 1/2 cup of batter into the pan, using a ladle or a measuring cup. Use a spoon to spread the batter into a circle.

    Tip 3: Add pancake fillings, like bananas or sliced peaches, in the circles of batter. 
    Flip the pancakes when the bubbles burst
    Once bubbles begin to pop in the pancake’s center, it’s ready to be turned. Insert the entire spatula under the pancake’s middle. Lift the pancake quickly about an inch off the pan’s surface and flip it over.

    Tip 4: If you’re making pancakes for a large crowd, place them on a wire rack over a baking sheet (to prevent sogginess), and keep pancakes in the oven on low heat (approximately 200 degrees F to 225 degrees F) until you’re ready to serve. 
How To Make PanCakes At Home
 Thank You !

Want More These Types Of Homemade Recipes

#MAKEMOODWITHFOOD


Sunday, January 12, 2020

What is the best way to keep fast food fries warm?


 How to Keep Hot Food Warm Before Serving

  Tips for Keeping Food Warm When Cooking in Stages


When making batches of pancakes, French toast, stir-fries, and deep-fried foods, or when preparing large meals in stages, you might want to keep your hot food warm while you finish cooking other items or as you create more batches.


An Oven as a Warmer
To keep hot foods warm, transfer them to a baking pan, an oven-safe saucepan, or baking dish and keep them in a warming drawer, or you can set your oven at 200 to 245 F. If the food in question is pancakes, waffles, fritters, or any deep-fried items, and you want to prevent the item from getting soggy or soft, then keep it in a single layer.

For food that must be kept warm for more than 16 or 22 minutes, check with an instant-read thermometer to be sure it is at least 145 F. If it is not, then increase the oven temperature a little. If you try to keep the food warm for more than an hour or two, the texture of the food may become spongy or the flavor profile might change.


Slow Cooker or Chafing Dishes


For hot vegetables, mashed potatoes, sauces, stews, and similar foods, a slow cooker or chafing dish may be used on the low setting to keep food items warm. Similar to an oven, if you plan to store foods for longer than an hour, you may notice a change in texture or taste. Although the item is set to warm, the food may continue to slow cook to a slight degree.
 

Saturday, January 11, 2020

How To Make Crispy Potato Chips At Home


                         How To Make HomeMade Potato Chips At Home

      Homemade chips 
  
serves: 4 

Cost: cheap
Prep: 15 min

Cooking: 20 min
- Here's how to make them;

Homemade chips are the perfect side to so many dishes. Whether you love them crispy and crunchy or soft and chunky, skins on or skins off, the beautiful thing about making your own chips is you can cook them every which way you love.

Ingredients;

  •     750g potatoes
  •     Vegetable oil (around 500ml if you're frying)

Method;


  1.     If baking your fries, pre-heat your oven to 200°C
  2.     Wash and slice your potatoes. Peel your potatoes if you want or leave the skin on for a more rustic feel.
  3.     Par-boil your potatoes in salted boiling water for around 5-10 mins until just soft.
  4.     If baking, toss the chips in vegetable oil, making sure they’re all covered and bake in the oven for20-25 mins until golden brown and crispy.

                           
How To Make HomeMade Potato Chips At Home
Homemade chips
    5.  If frying, fill a saucepan 3/4 full with vegetable oil and heat until bubbling. To test if the oil is hot enough, drop a small cube of bread into it – if it crisps up, it’s ready. Fry the chips in batches until golden and crispy and remove from the oil with a slotted spoon and place on some kitchen roll to absorb the leftover oil.

      6. Sprinkle the chips with salt or herbs  and serve.
                           
                               
How To Make HomeMade Potato Chips At Home
Homemade chips
          7.Baking chips is healthier than frying but you won't get the same crispness as frying. You can fry with oil and a saucepan or in a deep fat fryer if you have one


THANK YOU !
#MAKEMOODWITHFOOD

Friday, January 10, 2020

How To Make French Fries Like Mcdonalds

                                   How To Make French Fries Like Mcdonalds

 Step 1 : Cooking Materials

  •     Potatoes - 1 per person is more than enough!
  •     1qt/ltr cooking oil - peanut oil is best
  •     Seasonings - I just used salt, but this is where you can get creative!
  •     Knife for cutting
  •     Colander for rinsing
  •     Pot for frying
Step 2: Cut Potatoes
                 
How To Make French Fries Like Mcdonalds

  • Scrub the potatoes well.
  • Cut potatoes into 1/4" fry shapes.
  • Rinse cut potatoes in a large bowl with lots of cold running water and cover with water by and ice. Refrigerate at least 30 minutes.


Step 3: Heat Oil
 
  • In a large pan (or an electric deep fryer), heat oil over medium-low heat.
  • If you have a candy thermometer (recommended), heat until the thermometer registers  (165 C).
  • Make sure that you have at least 2 inches of space between the top of the oil and the top of the pan, as the oil will bubble up and could splatter when the fries are added.


How To Make French Fries Like Mcdonalds

Step 4: First Fry

  •  Drain ice water from cut fries and wrap potatos in a clean tea towel and thoroughly pat dry.
  • Increase the heat to medium-high and add fries, a handful at a time, to the hot oil.
  • Fry, stirring occasionally, until potatoes are soft and limp, about 8 minutes.
  • Using a slotted spoon or sieve, carefully remove fries from the oil and set aside to drain on paper towels.
  • Let rest for 10 - 15 minutes or so.
Step 5: Second Fry
  •  When ready to serve the French fries, reheat the oil to  175 C.

                         
How To Make French Fries Like Mcdonalds

  • Transfer the potatoes to the hot oil and fry again, stirring frequently, until you like the way they look, 1-5 minutes. I like em almost burnt, so I left them in pretty long.
  • Transfer to paper towels again and sprinkle with seasoning to taste. Serve immediately.
Thank You!
#MAKEMOODWITHFOOD

Thursday, January 09, 2020

How To Make A Sandwich Step By Step Pictures

                         How To Make A Sandwich Step By Step Pictures

Material Needed;
  • Sliced sandwich bread,
  • Favorite condiments that you want on your sandwich,
  • Favorite sandwich sliced meat,
  • Favorite cheese,
  • Lettuce,
  • Tomatoes,
  • Pickles,
  • Knives (1 for slicing, and 1 for spreading condiments),
  • Plate,
  • Paper towels,

Step 1: Before You Begin
          Prepare the vegetables that you want to add to your sandwich.  Tomatoes and lettuce are common vegetables added to sandwiches. Rinse all vegetables with clean water and dry them with a paper towel. Slice tomatoes and any other veggies that need slicing,


Step 2: Gather Needed Materials
       Gather the materials needed on a flat ,clean, and sanitary surface. Take out two slices of your favorite bread. Some of the most common types of bread are white, wheat, sourdough, multigrain,

            
https://makemoodwithfood.blogspot.com/2020/01/how-to-make-sandwich-step-by-step.html

Step 3: Condiments
   
          Open your favorite condiment jar. Insert spreading knife into the jar and load the desired amount of condiment onto knife. Then spread condiment evenly onto one side of a sliced piece of bread. You can repeat this step for any additional condiments that you wish to eat. You can mix some of the condiments together to try a variety of different flavors. Which condiments you put on your sandwich is only limited by your imagination.

Step 4: Meat
 Choose your favorite meat(s) and place onto one of the pieces of bread on the side with the condiment. Make sure to spread the meat in a way will go all the way to the edge of the bread. If your meat is round, you can slice the meat in half and place the straight edges along different sides of the piece of bread.  This will allow you to enjoy the desired meat flavor with every bite of your sandwich.
         
https://makemoodwithfood.blogspot.com/2020/01/how-to-make-sandwich-step-by-step.html


Step 5 - Use Of Cheese
Place your desired amount of the cheese you have chosen on top of the meat. Make sure add enough cheese to cover the entire sandwich.
 Step 6 - Toppings
Place the desired toppings (sliced tomatoes, pickles, lettuce, ) on top of your cheese.
Step 7 - Bread Slice
Place the second slice of bread with the condiment covered side down on top of your toppings.
Step 8 - Cut Out
If desired, slice sandwich into a shape that will make it easier to handle. Some common shapes are rectangles where you cut the sandwich down middle or triangles in which you cut the sandwich diagonally through the middle. You may also cut it into decorative shapes like stars or hearts if you are feeling imaginative.
Step 9 - Now Serve And Enjoy Your Home Made Sandwich.

Additional Tips;

If your sandwich is too dry try removing one of the slices of bread and spreading more condiments on it. You may also try adding tomatoes or pickles to moisten your sandwich.

If You Enjoyed or Liked Then Do Support Me Subscribing And DO Comment 

Thank You!

#MAKEMOODWITHFOOD

How to make momo shape

                                          How To Make Momo Shape

Dumplings are a delicious Asian dish, made by filling thin sheets of dough with meat or veggies. There are a lot of ways to wrap dumplings, but 2 of the most popular shapes are the pleated crescent and the purse. Try them for yourself at home using store-bought dumpling wrappers or making your own dough with flour, water, and salt. Now step away from the takeout menu and into the kitchen,

           Ingredients  For Homemade Dumpling Wrappers

  •    2 cups (256 g) of all-purpose flour
  •     1/2 teaspoon (2.8 g) of salt
  •     3⁄4 cup (180 ml) of boiling water
 
How To Make Momo Design
How TO Make Momo Design


    1. 
Place 1 tbsp (14 g) of filling in the center of a round dumpling wrapper. Use a spoon to scoop out the filling of your choice. Pile it as close to the middle of the circular wrapper as possible.
         You can use any type of filling you’d like, such as pork or veggie,


    Tip: For this particular shape, it helps to shape your filling in an oval, rather than a circle, to        .
            make   it easier to fold the crescent.
 2.
Brush water around the entire outer edge of the wrapper. Dip a pastry brush in water, then run it around the outside edge of the wrapper. This moistens the edge so it sticks together better and the dumpling won’t fall apart,

                            
How To Make Momo Design


3.
 If you don’t have a pastry brush, use your finger dipped in water instead.
    Use enough water so that the edge is moist but not completely saturated. If it’s too soggy, the wrapper will rip,

 Fold one side of the wrapper over onto the other side. Line up the edges as you fold the dumpling wrapper in half over the filling. Make sure the edges are perfectly aligned and that one edge isn’t hanging over the other. This creates a half moon shape,

    Don’t pull too hard on the wrapper or you’ll tear it. If you’re having trouble folding it over, you might need to remove some of the filling,

 4.
 Make pleats along the joined edges of the wrapper to seal it. Start at one corner of the open side of the wrapper. To make the pleats, fold tiny sections of the dough over onto itself as you pinch the 2 edges together. This creates an effect that looks like a folded fan. Continue the pleating and pinching until the entire open side is sealed,

    Pinch the dough tightly as you work your way around the edge so that none of the filling falls out when you cook the dumplings.
    You can make your pleats as big or as small as you’d like them,

                   
How To Make Momo Design


  Seal each of the 2 remaining open edges by pinching the dough together. Find the 2 edges that form a "Y" shape with your original fold. Pinch the edges together on each open side, just like you did on your first fold, so that the dumpling is sealed in a triangle shape with a point at the center.

    If the edges pop open, pinch them more firmly or brush a little more water onto them to help them stay sealed.


Made It !
Comment Down Below

#makemoodwithfood

Wednesday, January 08, 2020

How To Make Momo At Home

                              How To Make Momo At Home

    A popular street food among the youngsters these days, momos are undoubtedly one of the easy snack recipes that you can make at home. Be it the veg momos, which are made using several vegetables or the chicken momos, they have become a trend these days. The word ‘momos’ itself can make anyone’s mouth water and comes from the Chinese loanword word ‘momo’ which means ‘steamed bread’. Having its origin in Tibet, this snack recipe is quite similar to Chinese dumplings. It’s one of the irresistible street foods and munching on it can never get boring! These dumplings are soft and juicy, and are traditionally steamed. However, these days the momos are cooked using various methods such as frying, pan-frying and tandoori. There are several types of momos that you can easily find in any nook and corner of India. You will be surprised to know that these days, momos are enjoyed in dessert and the ones that are popular are - chocolate and strawberry momos. Here’s one such popular recipe of momos, which is enjoyed by many and is prepared using minced chicken. This momos recipe is quite popular among the non-vegetarians and is enjoyed with spicy chilli-garlic sauce. Chicken Momos are again one of the traditional dishes of Nepali cuisine and resembles to Chinese Bao, however, differs a lot.

        To prepare chicken momos, all you need is: All purpose flour, boiled chicken, onion, ginger, green chilli, soy sauce and a little salt. The flour is kneaded into a dough, which is then rolled into small puris. While on the other hand, chicken is shredded and mixed with all the other ingredients. This filling is further added into those small puris and shaped differently. After a few of these dumplings are made, they steamed using a steamer. These chicken momos are enjoyed best with chilli-garlic sauce and tomato ketchup. To accentuate the taste of this momos, you can add spring onions in this recipe.
         Total Time40m 

         Prep Time10

        Calories400

        Ingredients of Chicken Momos

  •  450 gm all purpose flour   
  •  1 tablespoon refined oil
  •  1 large onion
  •  1 inch ginger water as required 300 gm boiled chicken 
  • 1 green chilli
  •  1/2 teaspoon salt
  •  1 teaspoon soy sauce chili
  Step 1- Chop the vegetables and wash chicken Chicken Momos is one such dish, which needs no introduction. However, it is pretty easy to prepare it at home without putting in much efforts. Here’s how you go about preparing it at home: To begin with rinse the veggies and chicken with lukewarm water, this will remove the adulterants. Then take a clean chopping board, chop the vegetables separately and keep them aside. 

 Step 2- Boil the chicken and then shred well Then take a pan or a pressure cooker and boil the chicken, with a pinch of salt and pepper. If you want to make it aromatic, you can add a small teaspoon of ginger and chili paste. If you like the flavour of garlic, you can add a small teaspoon of garlic paste. Once done, carefully shred the boiled chicken into fine pieces. Keep them aside.

Step 3- Prepare the dough and filling for Chicken Momos Now, take a deep mixing bowl and add refined oil in it followed by all purpose flour and salt. Mix well with enough water and knead the mixture into a smooth dough. Knead well and ensure that no lumps are formed. Take another mixing bowl and add shredded chicken followed by chopped vegetables, mix well and combine everything together. Then, add soy sauce to the chicken mix and stir well. Now take the prepared dough and roll out small balls out of it.
          
Chicken Momo
Chicken Momo

 Step 4- Flatten the dough balls and fill it with chicken stuffing, and steam for 20 minutes Using a rolling pin, flatten the balls in a square shape and add the chicken and veggies stuffing in the center. Bring the edges close and secure them to make a momo. Repeat this step with the remaining balls. Transfer the prepared momos in a steamer and steam for 20 minutes or until they turn soft and tender. To make it more flavoursome, add the aromatic Chicken stock. Serve fresh and hot with your choice of chutney or dip.


       Thank You Enjoy Your Food..
       #MAKEYOURMOODWITHFOOD